Félip has been on a fully vegan blended diet since January, 2017. We’ve had amazing results with it and wanted to detail how we make his feed and some of the things we’ve learned along the way. This post isn’t specifically aimed at parents wanting to do a vegan blended diet. You can blend whatever ingredients you wish to feed your child.
Full disclosure: we’re not professionals or experts in tube feeding or nutrition. There are probably many other ways to make and administor a blended diet through a g-tube. This blog post covers our current methods and stuff that we’ve found out through trial and error. Also, we’ve plugged up a g-tube MIC-KEY port before (we’ve since stopped using raspberries) and had to throw it out. We now always keep at least one extra port on hand for such events.
Creating recipes
Félip is followed by a dietician at the children’s hospital. Our dietician was very supportive and helpful when we decided to transition to a blended diet. In order to be able to start creating recipes we needed to get his daily nutritional requirements/goals. We needed to know how many grams of protein, carbohydrates and fat to have in each recipe as well as vitamins and minerals. These requirements change with a child’s age and size and activity level. We also needed to know the total amount of calories required, as well as how much water he would need each day. Some of the water is given on its own with a syringe throughout the day, but a sizeable amount is blended with the food ingredients.
Once we had all this information, we were able to start creating recipes. One of the best resources we found for this step is a website/apps, Cronometer. (Signing up is free but you can upgrade to a paid account for a few extra features. We simply use the free version and it has everything we need.) Once you’ve created an account, this website can be used to track your daily nutrition and provide breakdowns of macro and micro nutrients. What we’re interested in is the “Your Custom Recipes” section on the “FOODS” page. Just click on “CREATE NEW RECIPE”. From here you just click on the green “+” symbol next to the “Ingredients” section title and add ingredients by searching for them. The website does have data for specific brands of products but uses mostly generic product information.

This is where the fun part comes in. We basically just play around with adding various ingredients, keeping an eye on the nutrient information underneath, until we end up with a new recipe that covers Félip’s daily requirements. We now have several different recipes for him that we’ve developed over time and still keep making more every once in a while.
An important thing to keep in mind when making recipes is food pairing. Not in the tastiness kind of way, but in the nutrient absorption kind of way. Iron is known to be better absorbed with vitamin C, same thing with calcium and vitamin D. Calcium is also known to inhibit iron absorption.
When we started creating and preparing recipes, we quickly realized that some of the quantities were a bit harder to work with. Like measuring leafy greens and frozen fruits and veggies. We decided to buy a kitchen scale, which was a great idea! We bought this simple inexpensive one from Amazon. We use it all the time now.

Making a blend
A blender is obviously needed here. There are many different kinds of blenders but it has to be a decent high speed blender. Regular, cheaper blenders won’t be enough to really liquify the foods in order to go through the feeding tube. We were looking at both Blendtec and Vitamix blenders (see this article that nicely compares both brands and different models). We chose to go with Blendtec, mainly because the blades are blunt. That helps with cleaning and maintenance. Both are a very good choice for making blended diet recipes. We also managed to get a refurbished Blendtec unit at a more affordable cost through their medical discount program, which we we’re very thankful for. If anyone is interested in the medical discount programs, just send a message through Blendtec or Vitamix’s customer service departments inquiring about the program.
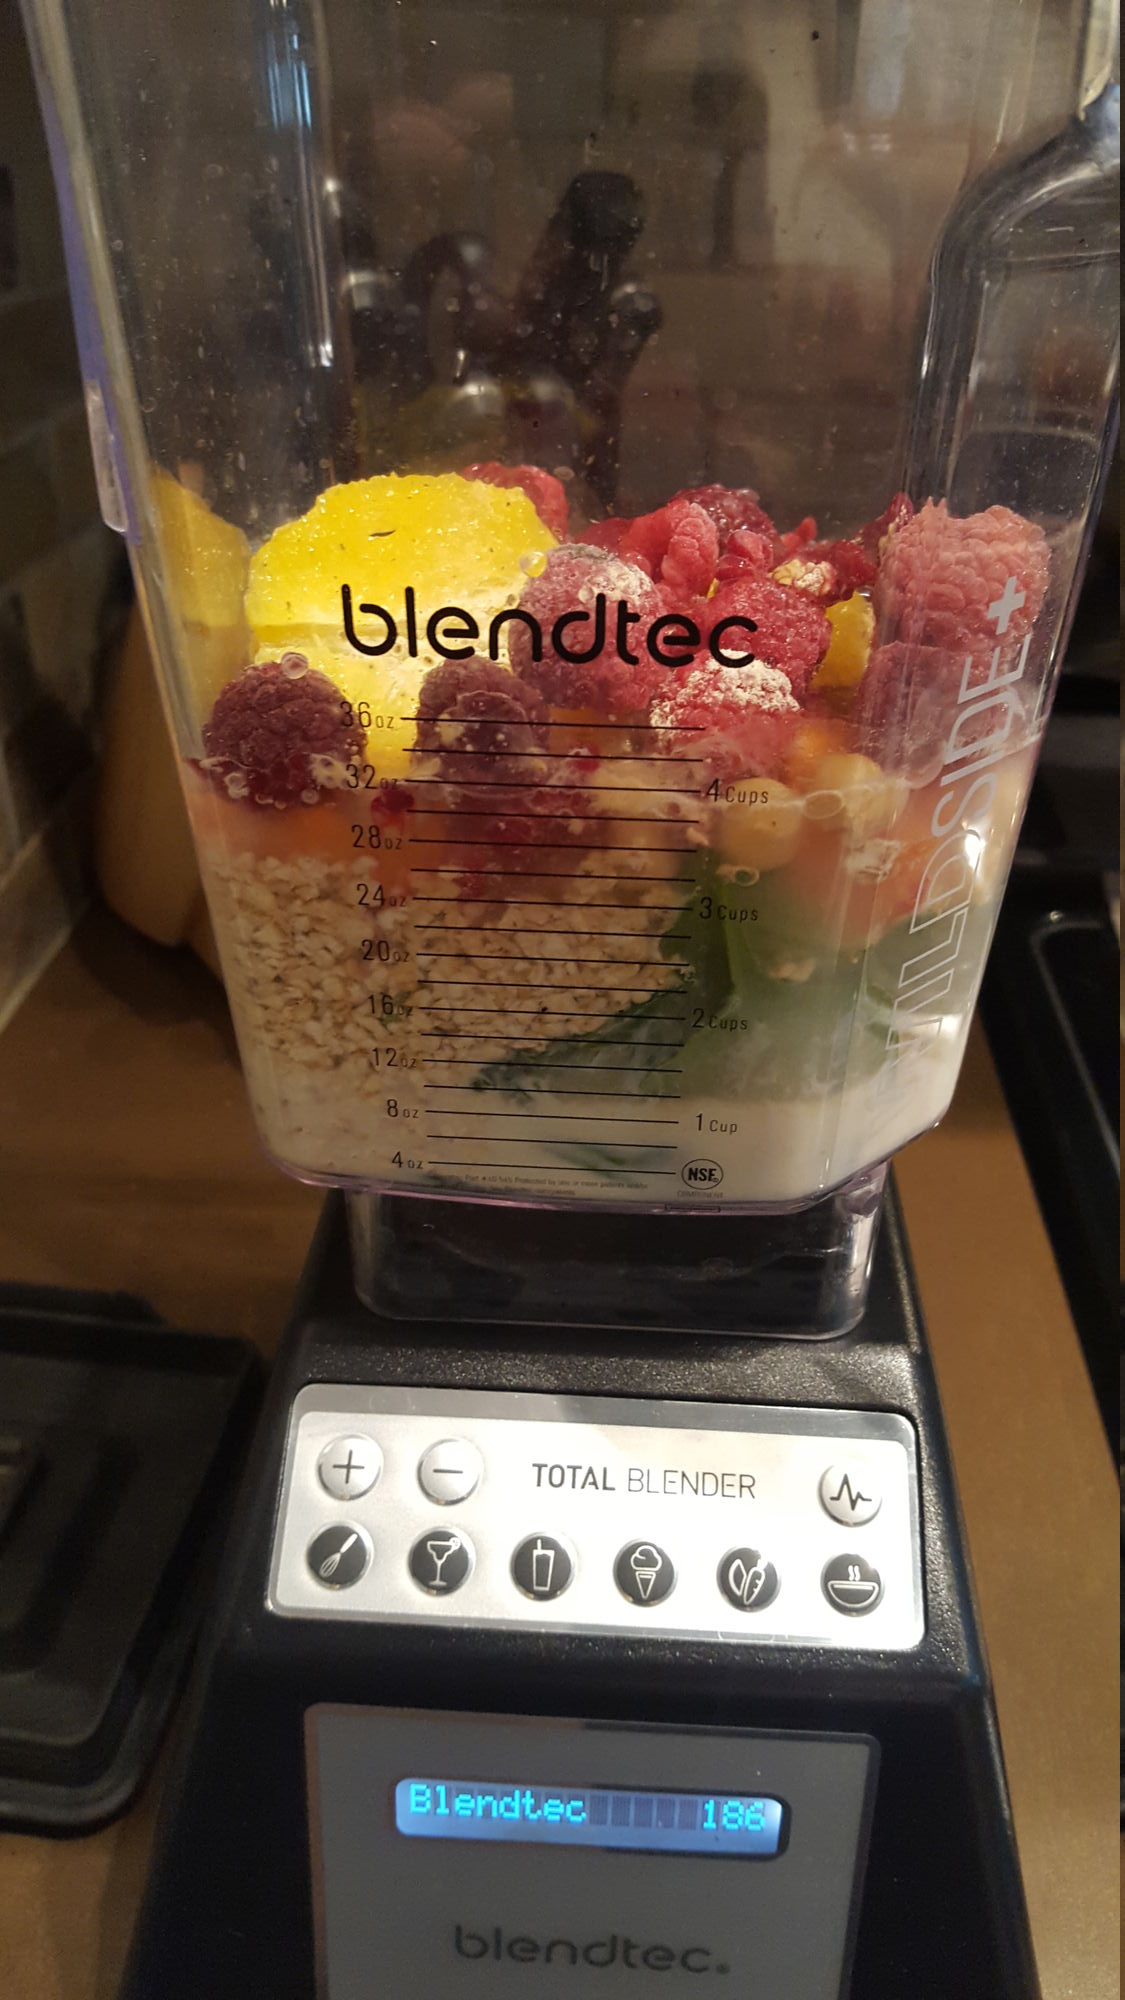
To make a blend recipe, we simply prepare all of our ingredients and measure everything out. Then, we start putting all the ingredients into the blender while following Blendtec’s directions (liquids first, then solids and then frozen foods). We also make sure to add the required amount of water to the blend as we calculated for his daily amount. When we started making Félip’s food we were making a single recipe for a whole day. We would change the recipe on different days to expose him to various different foods. We’ve now switched things up to making two different recipes per day. That way we can take care of food pairing and make sure his nutrients are being well absorbed.

The next step is blending! We make sure the lid is secured on top of the blender’s container and we start it up! With our Blendtec blender, we currently use the “Whole Juice” setting. Many other settings would probably work as long as it runs for a good amount of time. We’ve also found that we get better results by blending each batch twice.
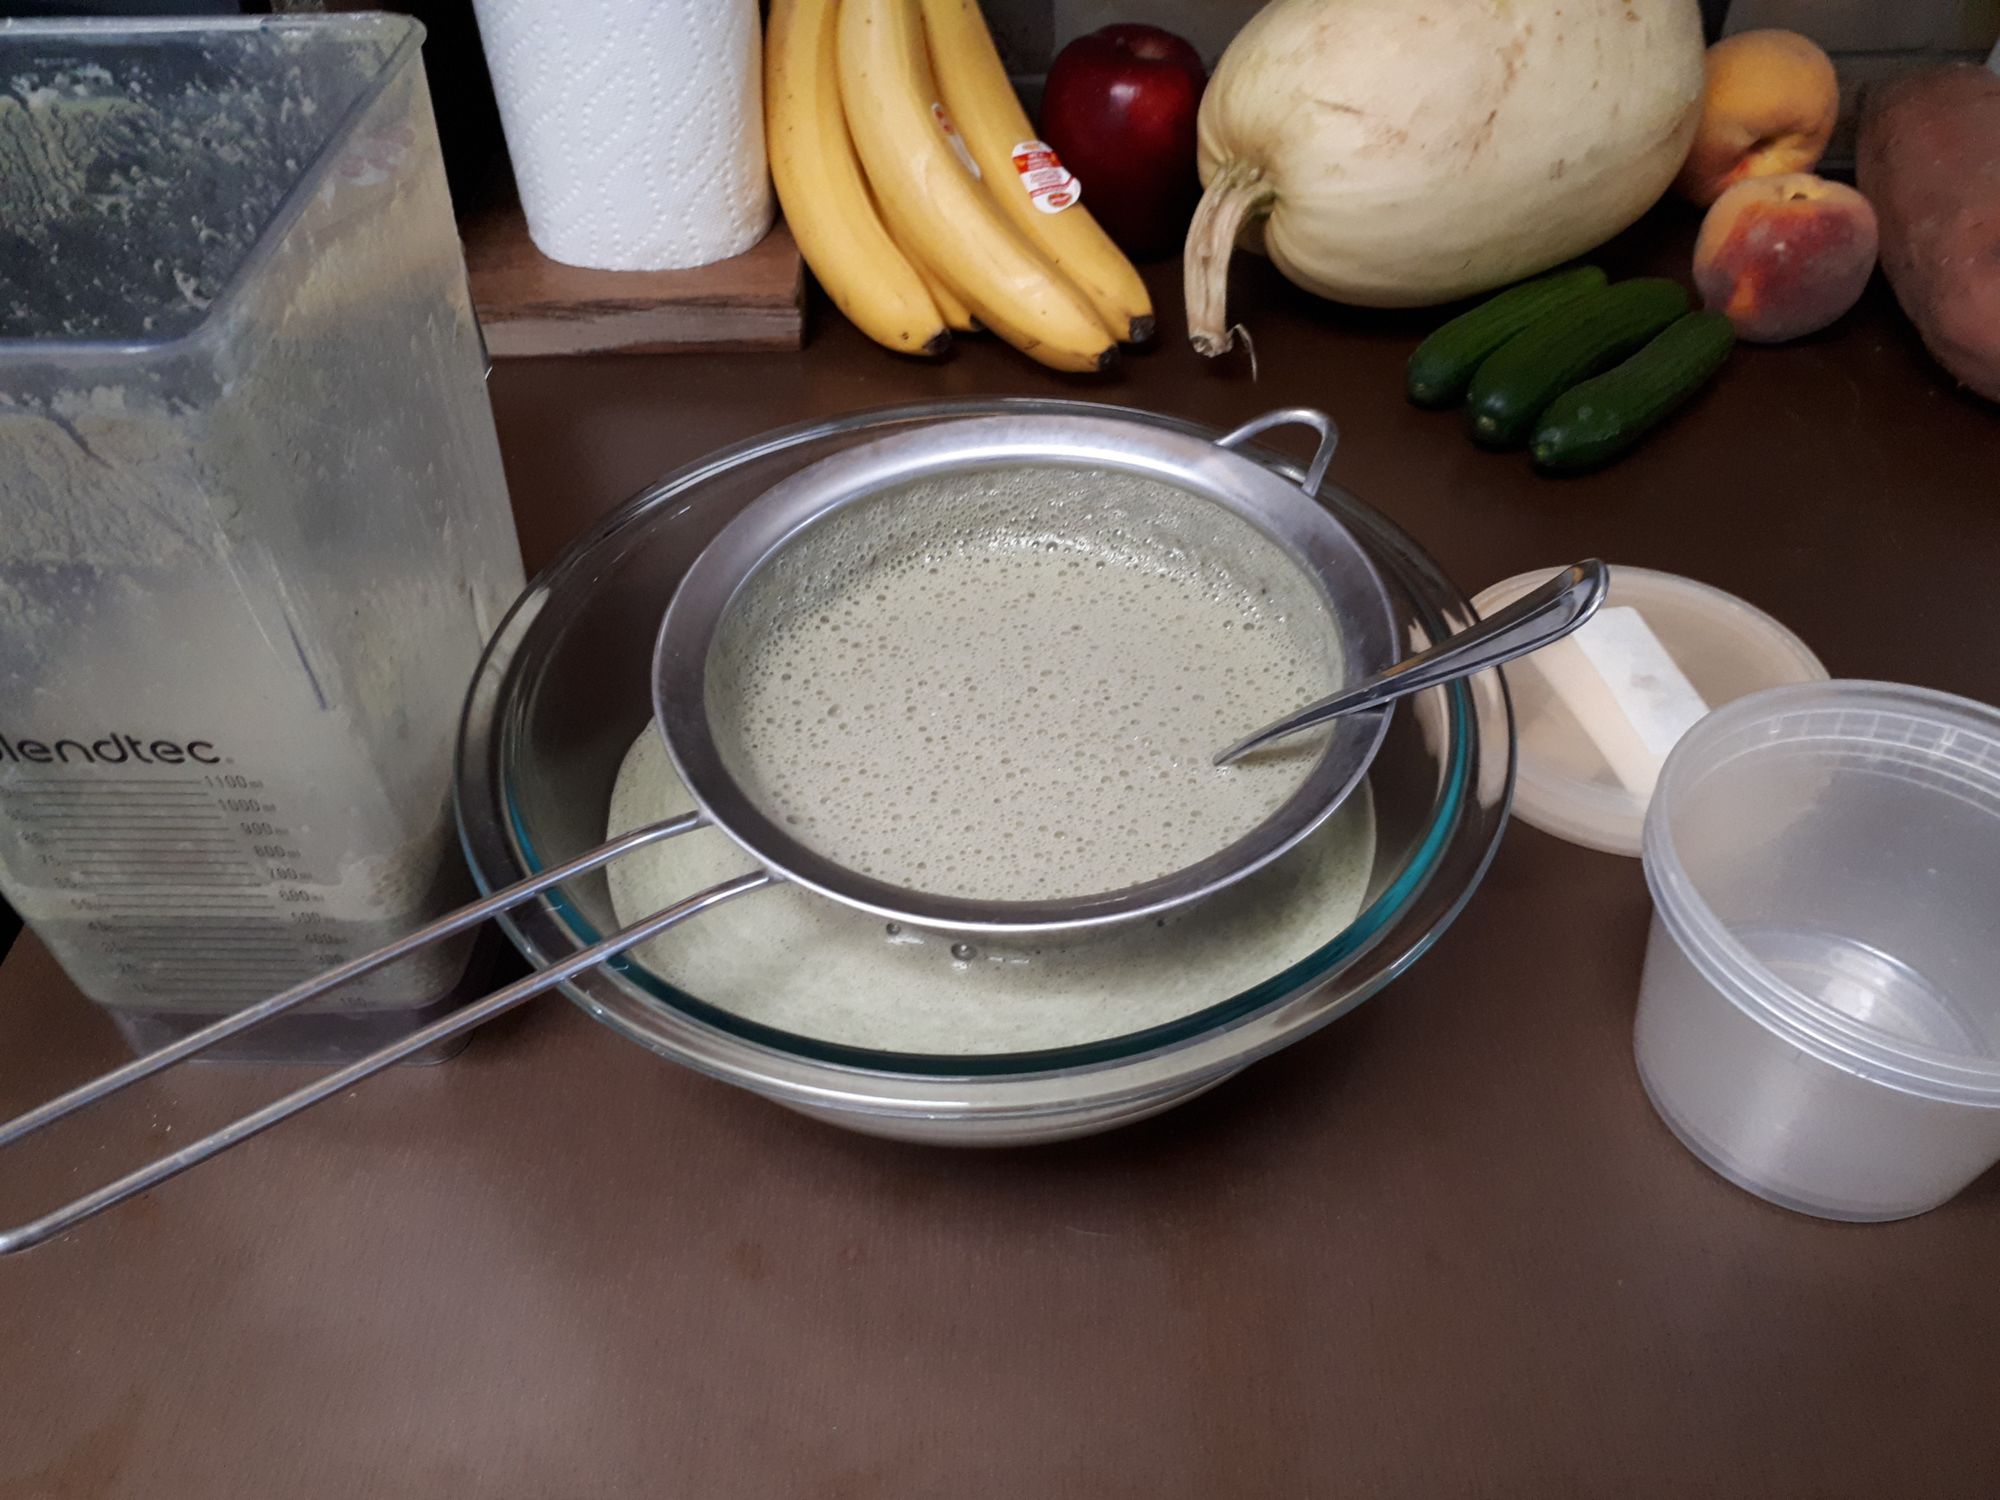
After everything is fully liquified, we strain the batch though a large fine mesh stainless steel strainer colander. This step is absolutely necessary for our blends because it filters out a lot of food residue such as seeds from different fruits or chunks of food that weren’t blended well enough. If it wasn’t for this step we would constantly be dealing with the feeding tube jamming. This is even more relevant if you plan to try to use a feeding pump to deliver the blended food.

After we’ve got a batch strained we just seperate it into 4 containers since we do 4 meals per day for Félip. We used to put the whole batch in a single container and pour individual feeds from the container before feeding him, but we found that wasn’t very convenient when on the go. With the individual feeds in the refrigerator we can just grab 1, 2, 3, or all of them when we leave the house.
Freezing batches of feed
At the moment we only freeze batches of feed whenever we plan to travel, or if Félip is going to be looked after at the Rotary Flames House or anywhere else. Some parents choose to prepare and freeze whole weeks of food at a time to only do the work once a week. One of the advantages here is being able to make a bunch of different recipes and vary what the child eats at every meal. One down side to freezing blended food is the need to re-blend them once they’re thawed. Similar to other frozen meals before they’re heated up; the food is a bit lumpy and some of the liquids and solids have separated. Mixing won’t cut it, a full spin in the blender is required. We’ve talked to other parents and everyone reports the same thing.
For freezing, we found plastic, reusable, recyclable containers on Amazon. We bought a pack of 32oz containers, as well as 16oz containers. These can go in microwave and the dishwasher. They’re nice and light and very affordable. We even use them for our own leftovers and meal prep! The plastic for the smaller containers isn’t very thick and you have to be careful when using them. Some reviewers report lids warping in the microwave, something we haven’t experienced, but we have broken a few containers. They also seem to stain with certain foods like tomato sauces. We originally considered getting more ecological glass containers but decided it wasn’t going to be as practical due to their weight and the amount of space they would take up.

Feeding a blended diet
When we started feeding Félip a blended diet, we were transitioning from a history of pump feeding (see this blog post where we detailed our feeding journey). We tried to use his feeding pump in the beginning, thinking it would be simpler this way. Tried, is the key word here. We were never able to get it to work, no matter how liquid we made his food. We’ve heard other parents report that they succeeded, so it might still be worth a shot.
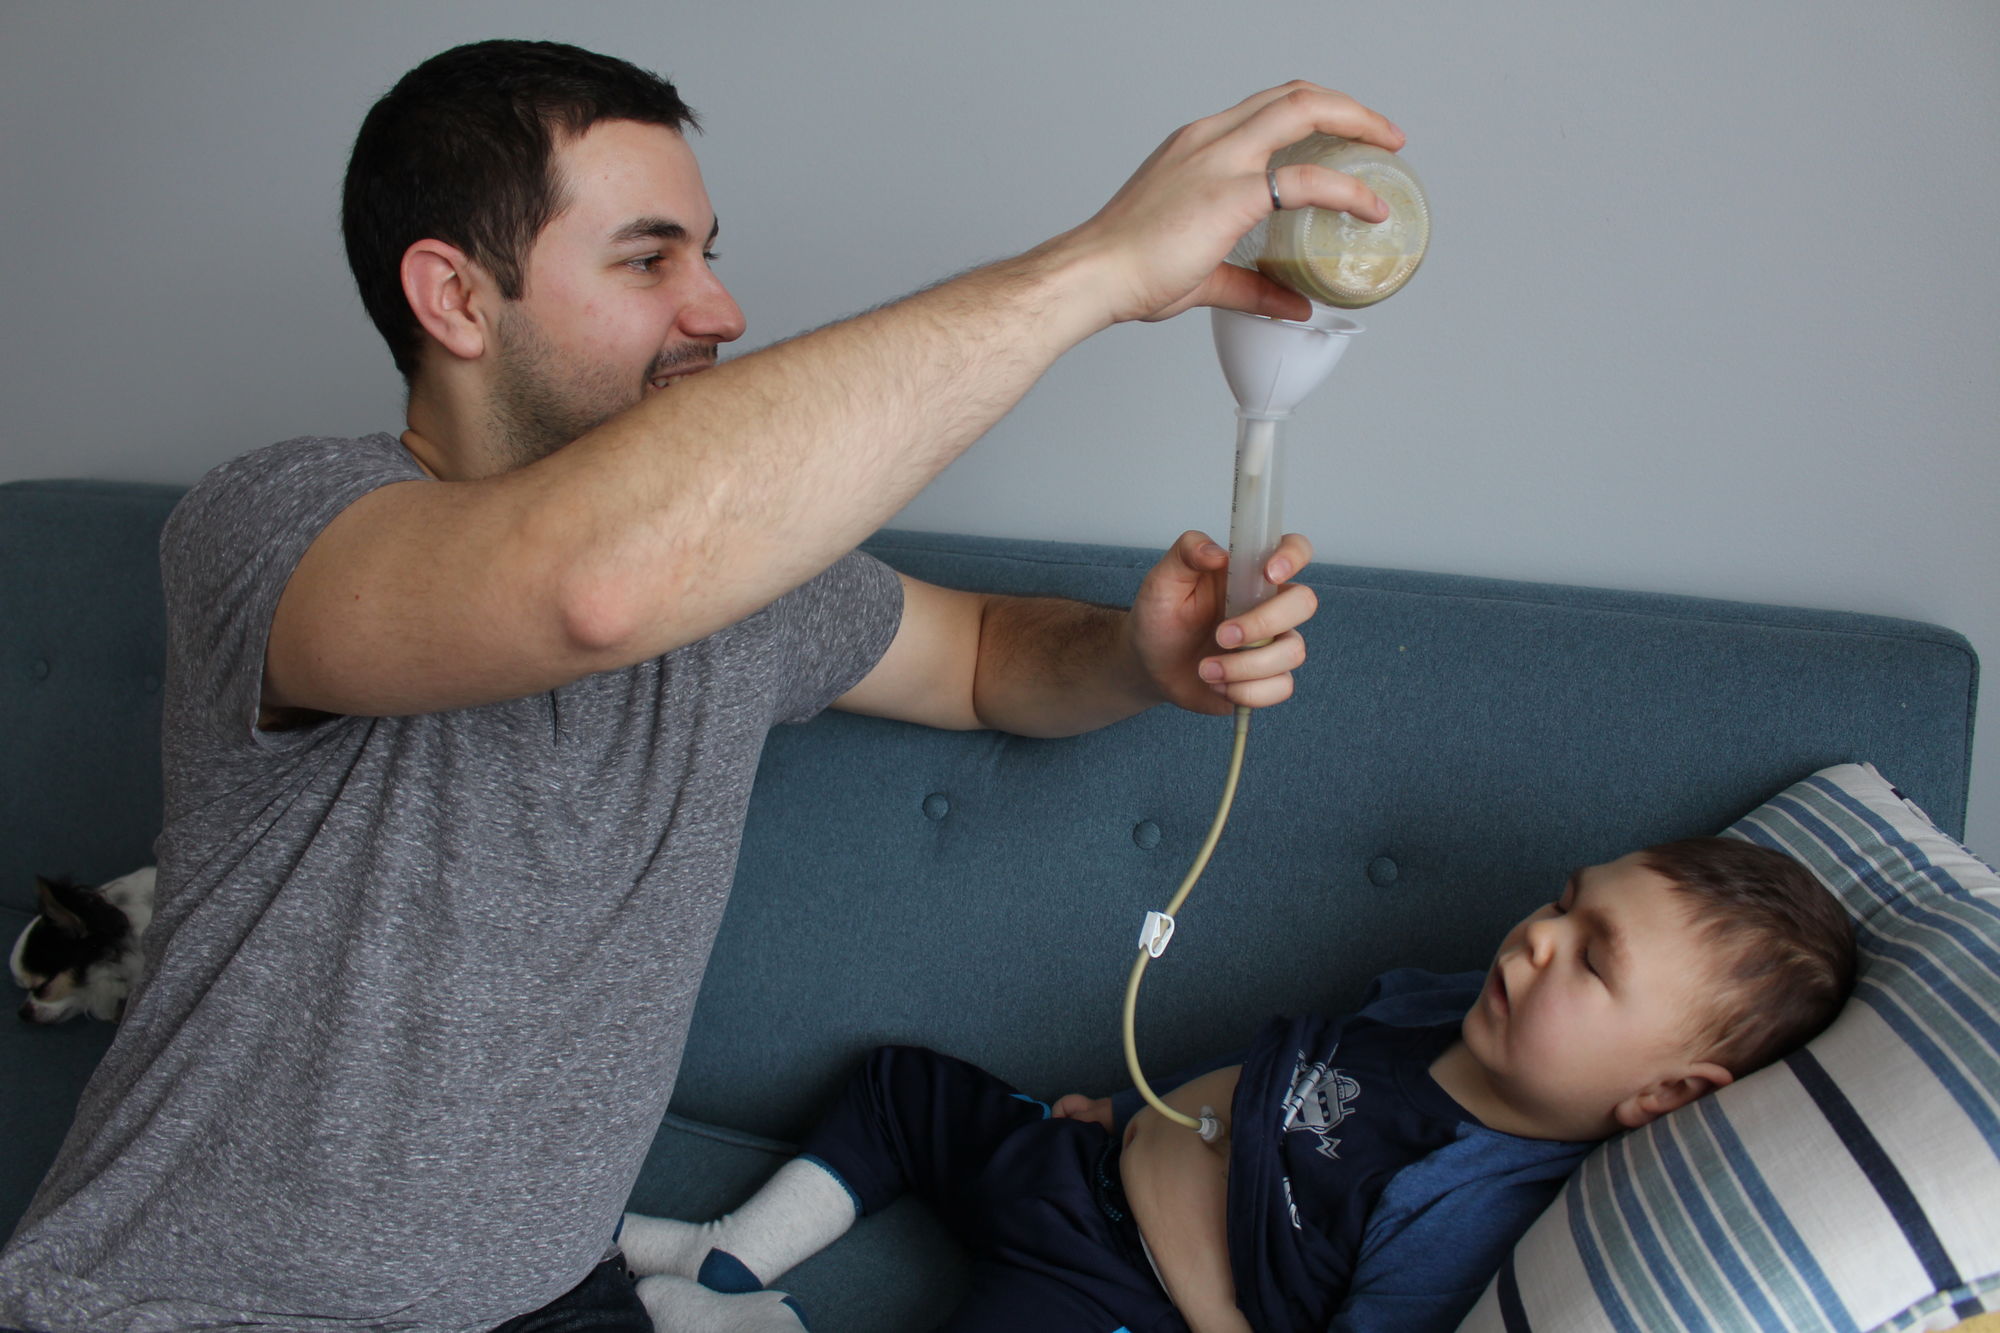
After failing with the feeding pump, we decided to try gravity feeding, and it worked great! We felt safe with gravity feeding. We felt like we couldn’t really overfeed him since we were never forcing food through the tube. We’ve only recently moved on to syringe feeds, and only because our new recipes are just too thick for gravity. That’s the downside to gravity feeding, the duration of a feed varies wildly with the consistency of the particular blend. The feeding is also frequently interrupted with small blockages as even the smallest particle that made it through the strainer might be enough to counter gravity’s power.

Syringe feeding is also nice. We just don’t think we would’ve been comfortable doing so at first. The thickness doesn’t really matter as much, as long as it can be sucked up through a catheter tip syringe, which reduces the amount of guessing to try and get the consistency just right. Feeding duration can be always consistent, which is great. We just found it weird at first since it felt like we were just shoving food into Félip’s stomach. Once we got past that feeling, we were able to appreciate some of the benefits of this method. Syringe feeding is not bad at all as long as we keep in mind how much we’re giving him over how long of a period of time.
Conclusion
We hope this information can be useful for other people wanting to start a blended diet. Our methods still aren’t perfect and we’re constantly learning new tricks and changing up our routine to try and make things easier for us and better for Félip. We love that we’re now making Félip’s food ourselves, it’s an enjoyable task and we get to pick super healthy foods to give him.
As always… Love. Laugh. Repeat.

